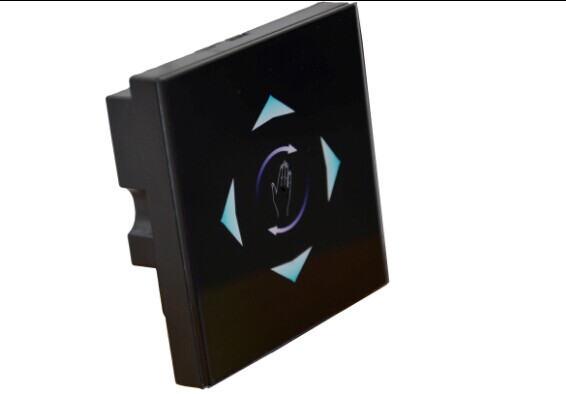
Gesture-Sensing Control Panel
| Place of Origin | Shenzhen |
|---|---|
| Brand Name | Okled |
| Model Number | FS01 |
| Inquiry | |
Detailed Product Description
Product Specification
NAME: Gesture-sensing panel
MODEL: FS01

Summarization
Gesture-sensing panel controller is a new high-end controller which newly developed by our company. It adopts glass panel design, is beautiful and fashionable in appearance. It adopts gesture-sensing control chip, no need to touch, just certain gesture can control output. It is used for controlling a variety of lamp whose source of light is LED. For instance, point source of light,flexible light strip, wall washer lamp, panel lights etc., it has many advantages such as convenient to connect, easy to use and others. According to the actual need of customers,it can carry out jumpy changing, gradual changing, stroboflash and other effects of change.
Technical Parameters
working temperature: -20-60 ℃
supply voltage: DC12-24V
output: 3 channels
connection mode: common anode
effective sensing distance: 0-5 cm
external dimension: L86 Χ W86 Χ H36.7 mm
packing size: L105Χ W105 Χ H53 mm
net weight: 124g
gross weight: 187g
static power consumption: <1W
output current: <2A( each channel )
output power: 12V<72W,24V<144w
External Dimension

Interface Specifications

Instruction
1. Gesture-sensing panel figure, the function of each gesture as follows:

(1) Under any state, gesture swipe left or right on the sensing panel which can open or close output of controller.
(2) Under on mode, gesture swipe up or down on the sensing panel which can adjust output of controller. Gesture swiping from up to down is mode increase, Gesture swiping from down to up is mode decrease.
(3) A single finger regard center of panel as the dot to draw circle, which can adjust mode output brightness/speed. Under static color mode, circling clockwise is brightness increase, circling anticlockwise is brightness decrease. The biggest circle number is 4, that is adjusting the min brightness to the max brightness or from the max brightness to the min brightness can circle 4 times. Under dynamic mode, circling clockwise is speed increase(1-8 level speed is adjustable), circling anticlockwise is speed decrease. Every time you adjust speed, the controller will ring short. When speed adjust to the max or the minimum, can not increase or decrease any more, at this time, the controller will ring long.
2. standard change is shown in the below table:
|
Mode No. |
Function |
Remarks |
|
1 |
Static red |
Brightness is adjustable. |
|
2 |
Static green |
|
|
3 |
Static blue |
|
|
4 |
Static yellow |
|
|
5 |
Static purple |
|
|
6 |
Static cyan |
|
|
7 |
Static white |
|
|
8 |
Three-color jump changing |
Speed is adjustable |
|
9 |
Seven-color jump changing |
|
|
10 |
Three-color gradual changing |
|
|
11 |
Seven-color gradual changing |
|
|
12 |
stroboflash |
|
|
13 |
autoplay |
Typical Application

Installation Method
1>. gently pry gaps in touch panel with a screwdriver, and then you can slowly remove the panel, as shown below;

2>take down the front sensing panel. Pull the locking of the terminal transposon, and then you can slowly remove the cable connecting front sensing panel and base board, as the following figure shown:


3>fix the base of controller in the 86×86 installation box (customers need to buy the installation box by themselves) on the wall with screws.
4>according to the method in step 2, install back the FPC cable connecting the front sensing panel and base board, check if the installation is proper.
5> press the panel back to the base, the installation is finished.
Remarks:
1. Connect the load wire at first, following by the power wire; Please ensure short circuit can not occur between connecting wire before you turn on the power;
2. The supply voltage of controller ranges in DC12V~DC24V, it may burn out the controller once exceed the voltage ranges.
3. Please stay away from the use of strong electromagnetic field, to avoid strong electromagnetic interference.
